How to install and Configure VSCode
This guide will walk you through the process of installing VSCode and using VSCode. This will allow you to write C programs and run them. If you run into any issues, please contact the subject staff.
Step 1
Ensure you have first installed GCC as described in the other guides (You will need to follow the WSL guide for Windows and the GCC for MacOS guide for MacOS).
Step 2
Download VSCode from https://code.visualstudio.com/download and install.
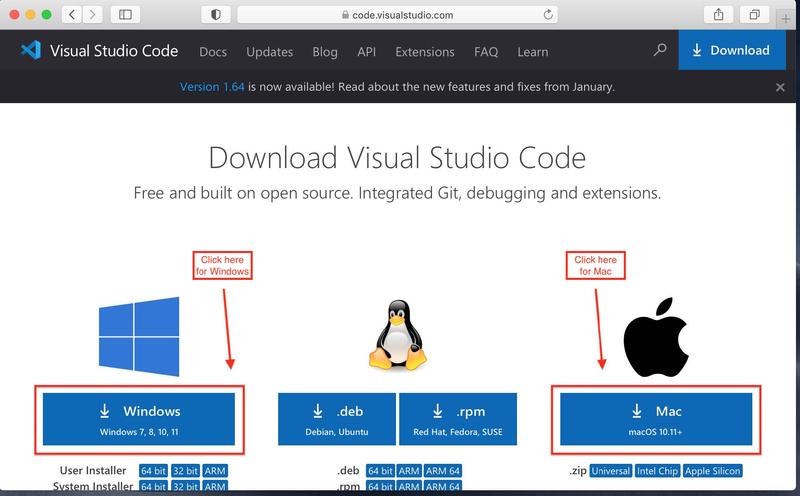
Note, you may be prompted to accept the download and verify before you install it
Step 3
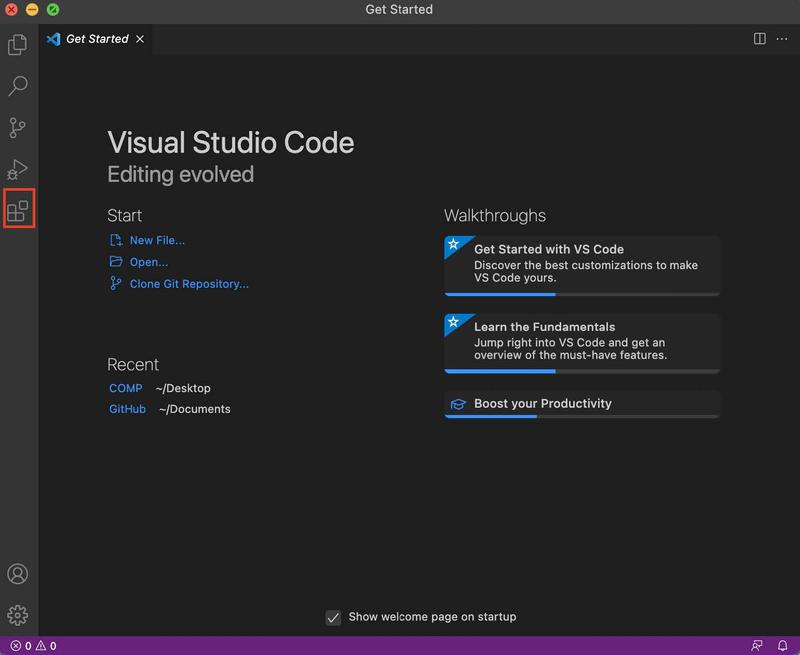
Open VSCode and click the “Extensions” tab on the left.
Step 4
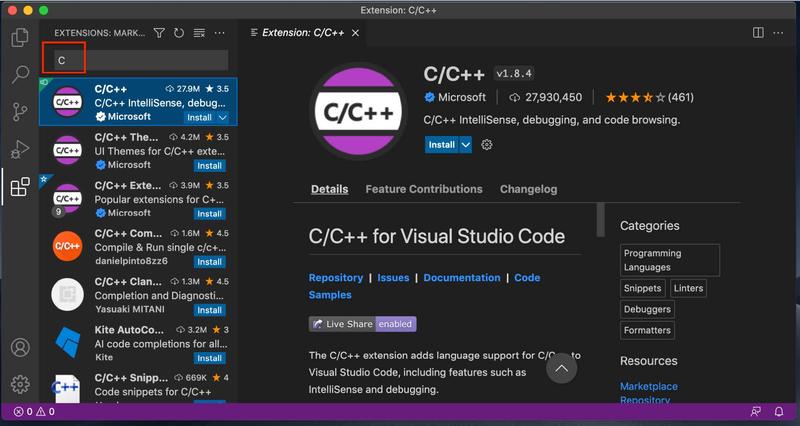
Search for “C” in the search bar in the top left.
Step 5
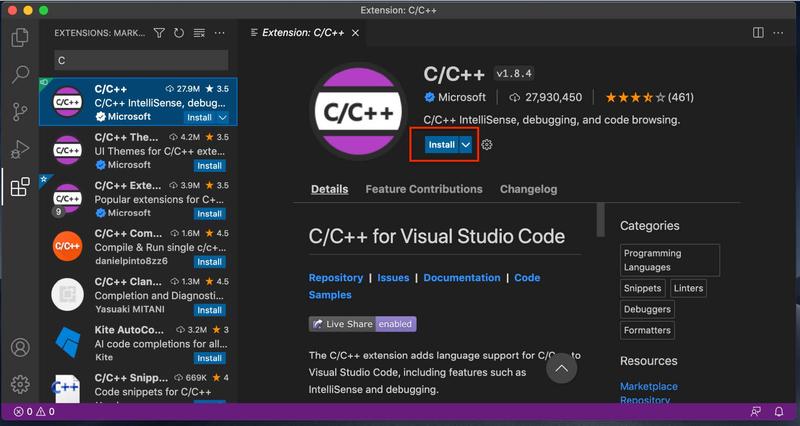
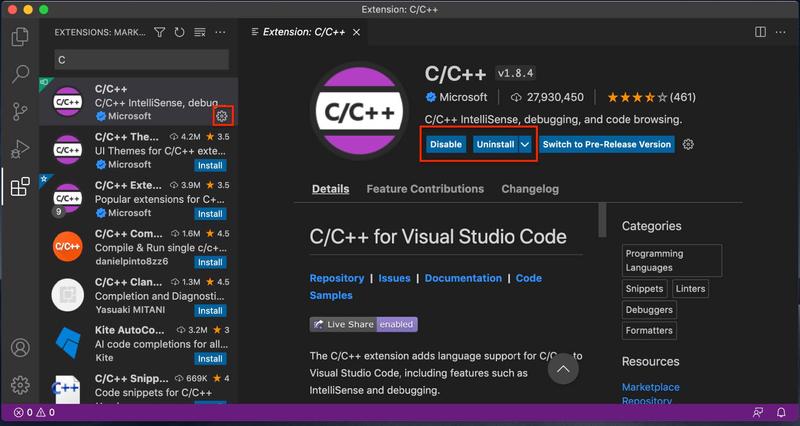
The first extension should be called C/C++, select it and click “Install”
Step 6
When installed, you will see a cog on the left list and the options to “Disable” or “Uninstall”
Step 7
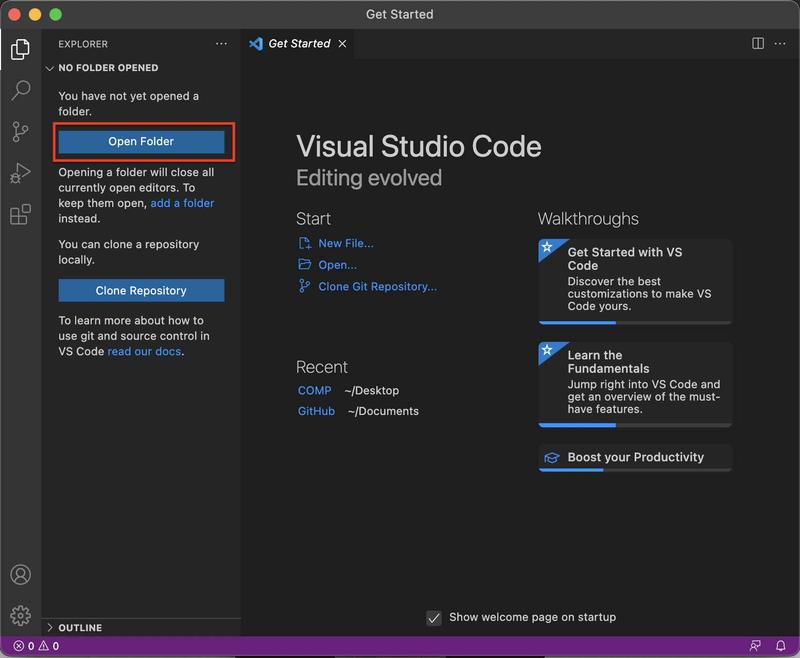
Go the “Explorer” tab in the top left.
Step 8
You can now open a folder for all your code to be easily accessible. Alternatively, you can create a folder for your COMP subject and sub-folders for Assignments, Lectures and Workshops and drag it in.

Step 9
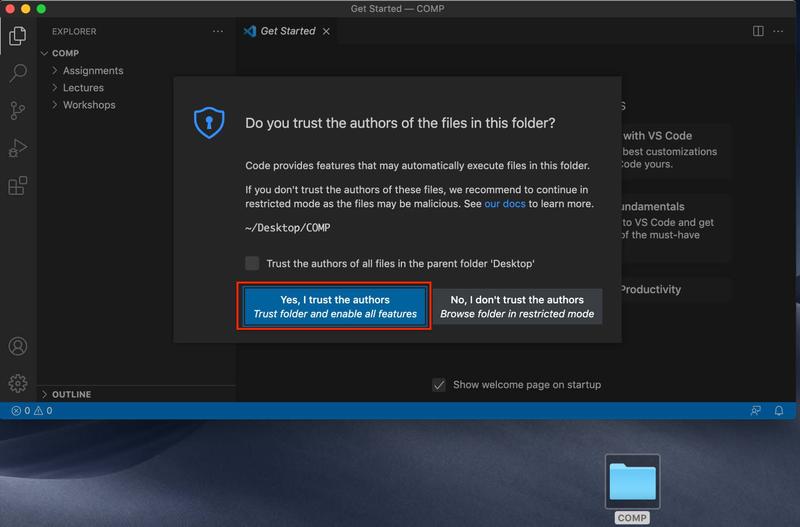
You can allow access of your own files in the folders you open.
Step 10
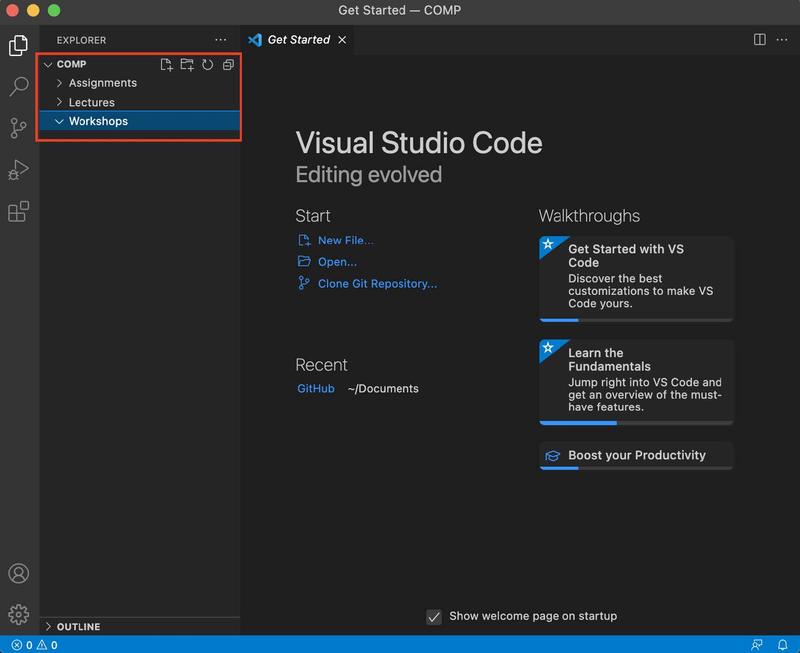
You can open your “Workshops” sub folder in the “Explorer”. Note the down arrow for the current folder.
Step 11
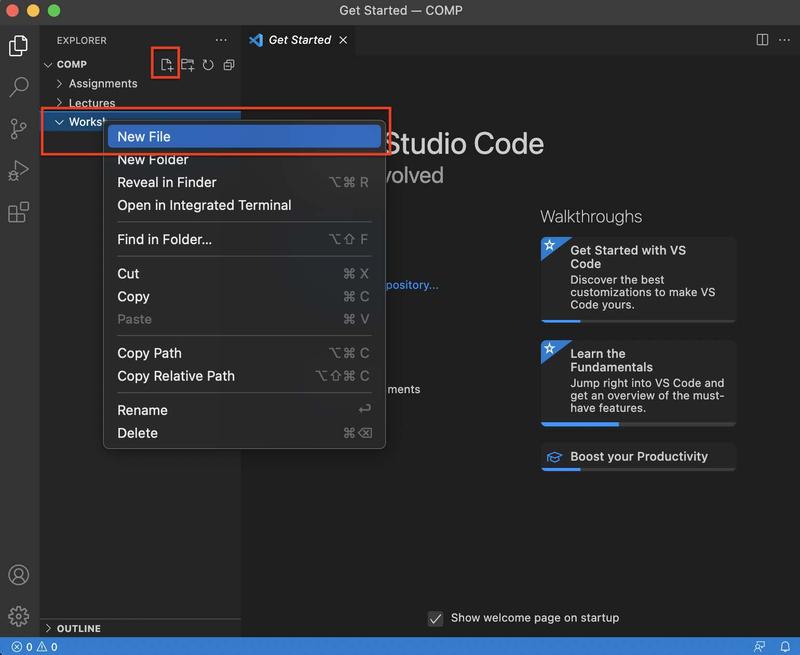
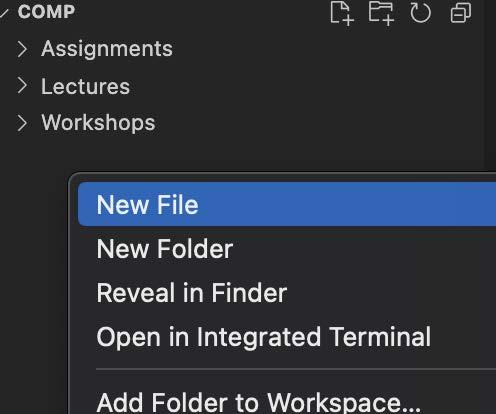
Create a new file by secondary click and “New File”. Alternatively, the document with a plus icon also creates a new file.
Step 12
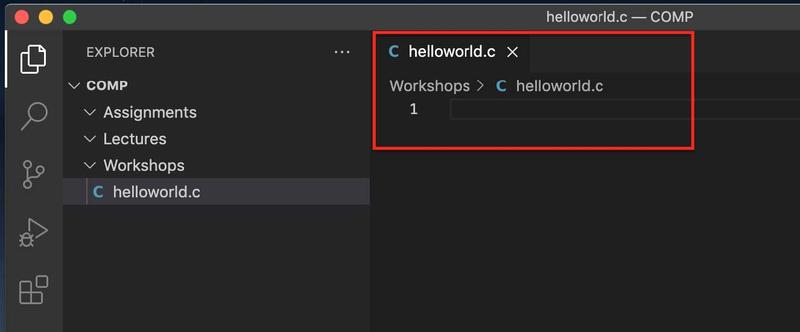
Name the file “helloworld.c” and you can type code in the section on the right that opens.
Step 13
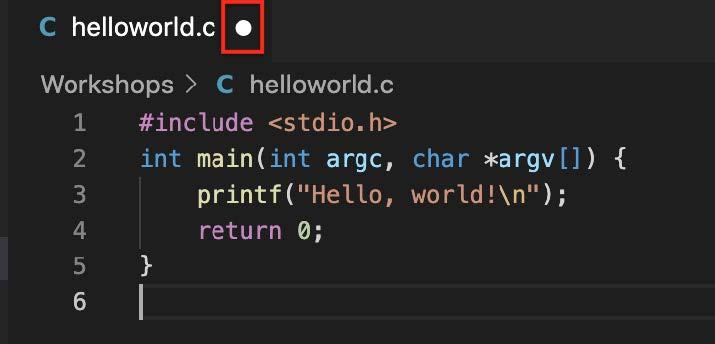
Note the circle next the file name, this is because it has not been saved since it’s last changes. Save with a shortcut, “ctrl+s” or “command+s” depending on your OS. Alternatively use the menu, and select “File” then “Save”.
Step 14
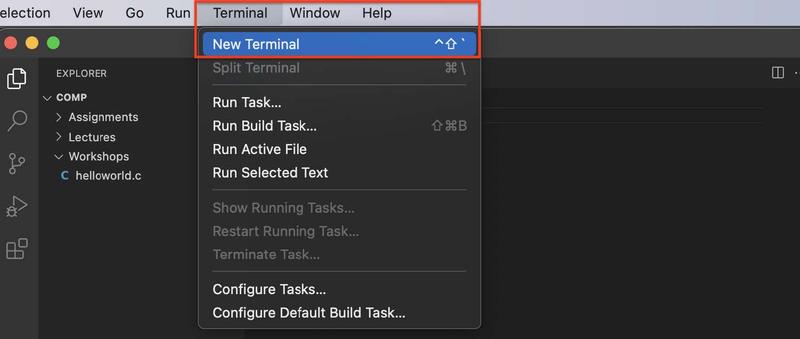
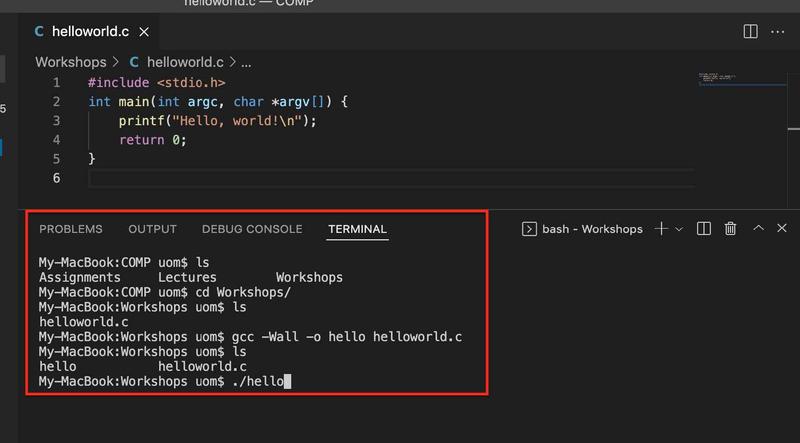
You can now compile your program to run it with a Terminal window. Note, if you have not installed GCC please follow those steps first.
Step 15
You can type commands to see your current accessible files ls in the Terminal, to navigate to
your folder cd <folder_name>, to compile your program gcc -Wall -o <executable_name> <C_program_name> and finally, to execute it ./<executable_name>. Note, these commands
are further described after step 16.
Step 16
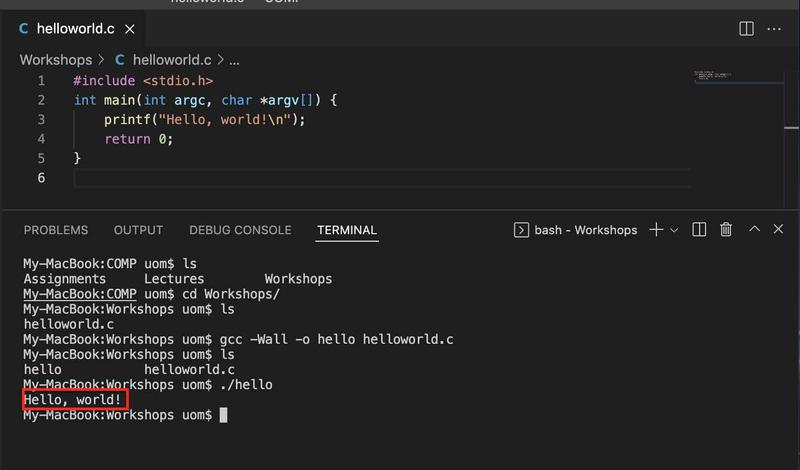
Your program will execute in the Terminal window
Additional Configuration to Make Your Life Better!
Step 17
Create a new file in the root directory, in this case the “COMP” folder.
Step 18
Name it “.clang-format” and paste the following in to the file (sourced from
# options: https://clang.llvm.org/docs/ClangFormatStyleOptions.html

BasedOnStyle: LLVM
IndentWidth: 4

# Must be 80 characters or less!

ColumnLimit: 80

# does (int) x instead of (int)x

SpaceAfterCStyleCast: true

# spaces for indentation, not tabs!

UseTab: Never

# if (x) doStuff() is not allowed, bad style

AllowShortIfStatementsOnASingleLine: false
AlignTrailingComments: true
SpacesBeforeTrailingComments: 3

# change the next line to All for Alistair's textbook style

AlwaysBreakAfterReturnType: TopLevelDefinitions

# #define SHORT_NAME 42

# #define LONGER_NAME 0x007f # does nice spacing for macros

AlignConsecutiveMacros: Consecutive

# use \n instead of \r\n - prevents issues on Windows

UseCRLF: false
Step 19
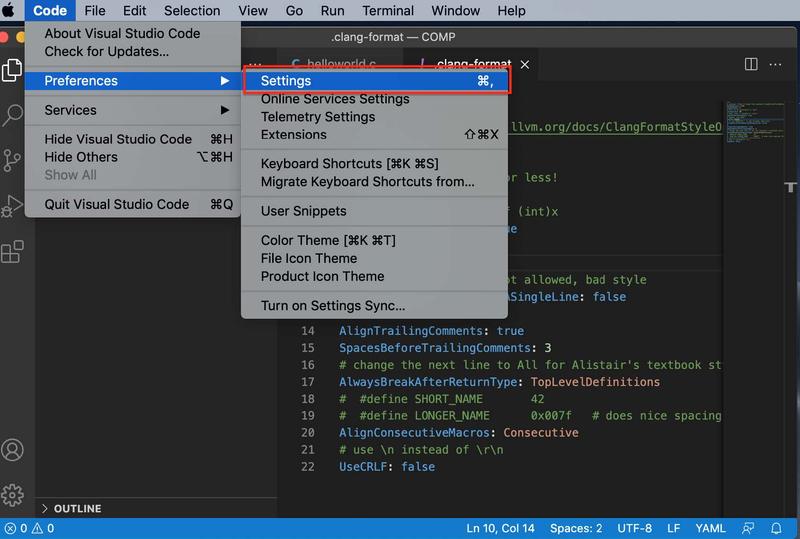
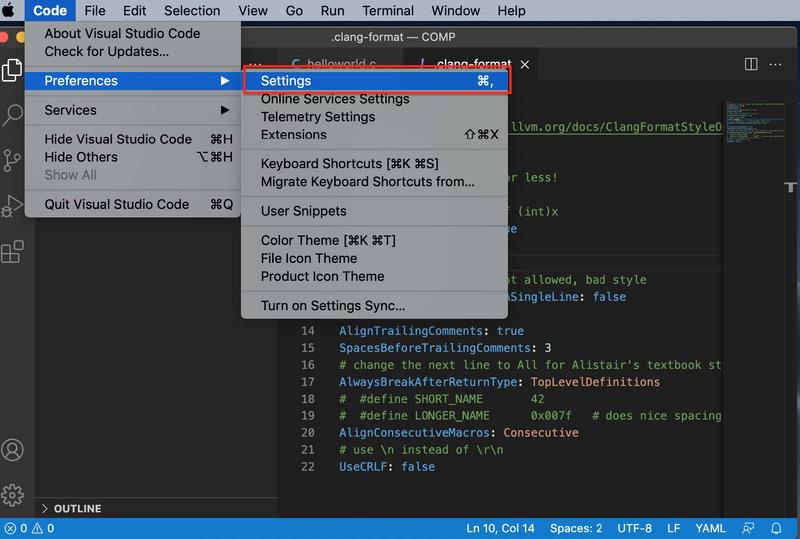
Go to “Settings”. You can use the shortcut, “command + ,” or “ctrl + ,” depending on your OS.
Step 20
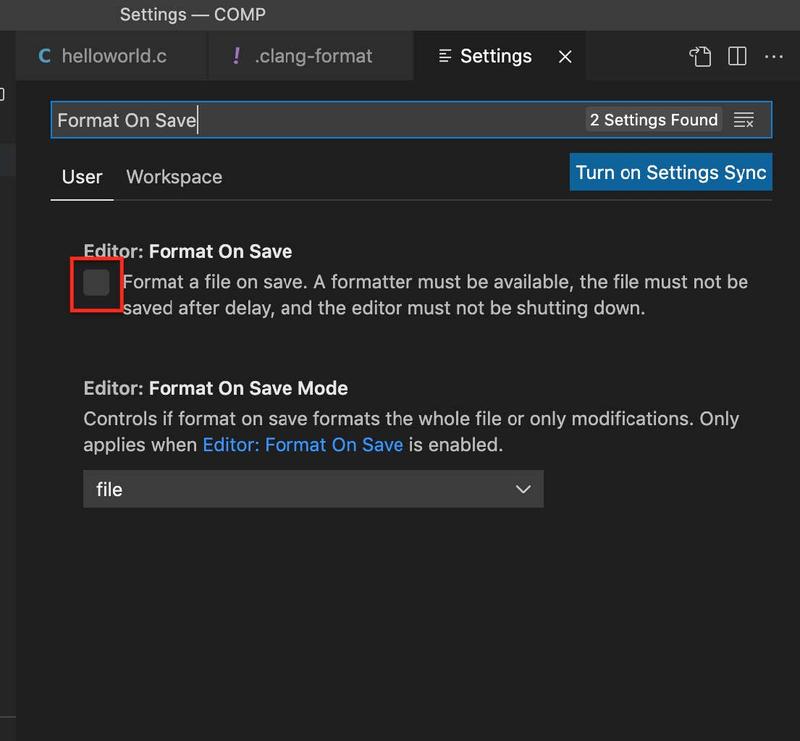
Do a search in the search bar for “Format On Save” and tick the box.
Step 21
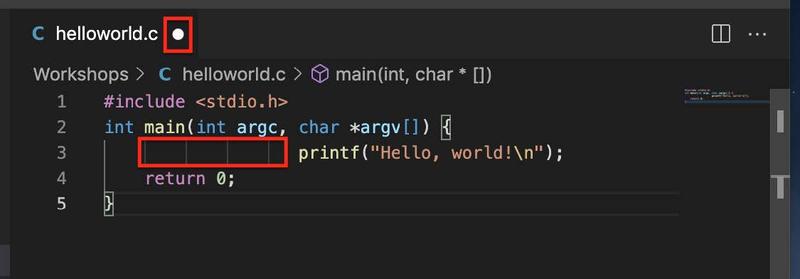
You can test the autoformatting by editing the “helloworld.c” program from earlier. Add in some inconsistent indentation and notice the circle showing changes.

Step 22
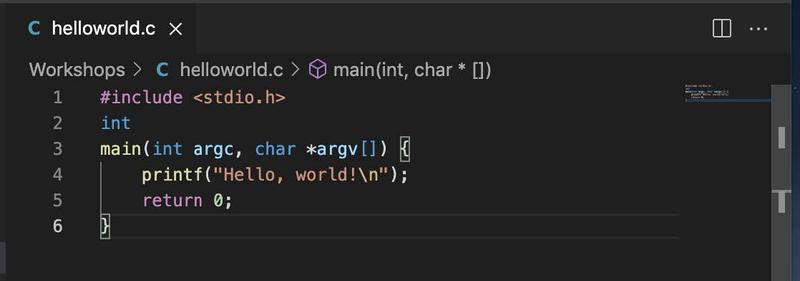
Save the file and the program will fix the formatting issues.
Step 23
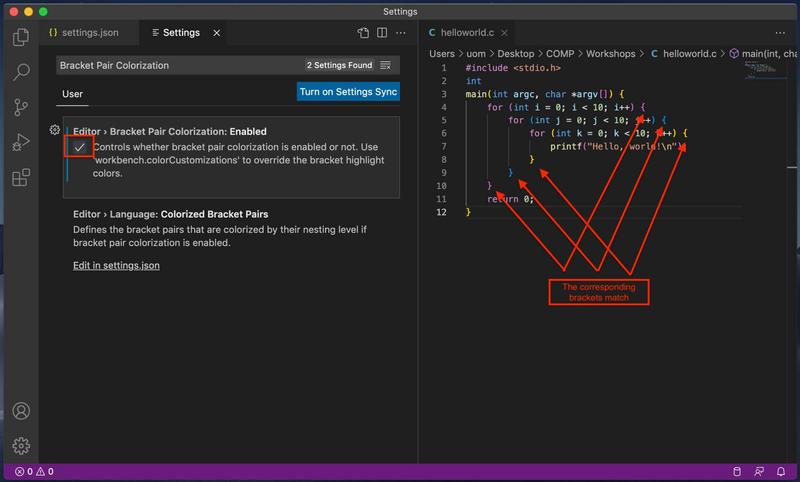
Go back to “Settings”
Step 24
Search for “Bracket Pair Colorization” and tick the box. Note that each set of brackets in the nested code has a unique colouring for easier identification.
Prepared by Thomas Minuzzo and Liam Saliba, February 2022