How to install clang on MacOS
This guide will walk you through the process of installing a compiler toolchain for macOS. This will allow you to write C programs and run them on your mac. If you run into any issues, please contact the subject staff.
Note that in a typical installation, you can run gcc but under-the-hood the operating system is actually running clang
Step 1
Open Terminal by pressing “command + Space Bar” to open Spotlight and then type “Terminal”. Alternatively, you can go to your “Applications” folder, then to “Utilities” and open “Terminal” from there.

Step 2
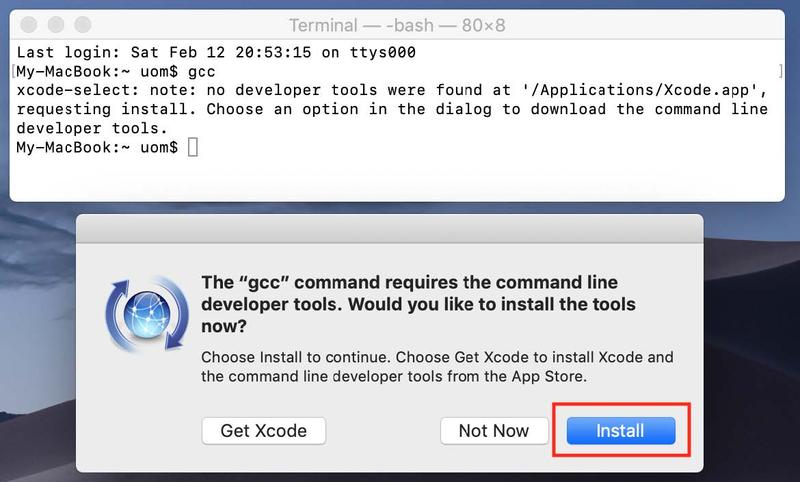
In the “Terminal” window, type “gcc” as below and press “return”

Step 3
You will be prompted to install “Xcode”. Press “Install”.


Note, if you see an error message as below, you already have GCC installed and can skip to installing VSCode. You can clarify this by typing “gcc –version” to see the version of gcc you have installed.
Step 4
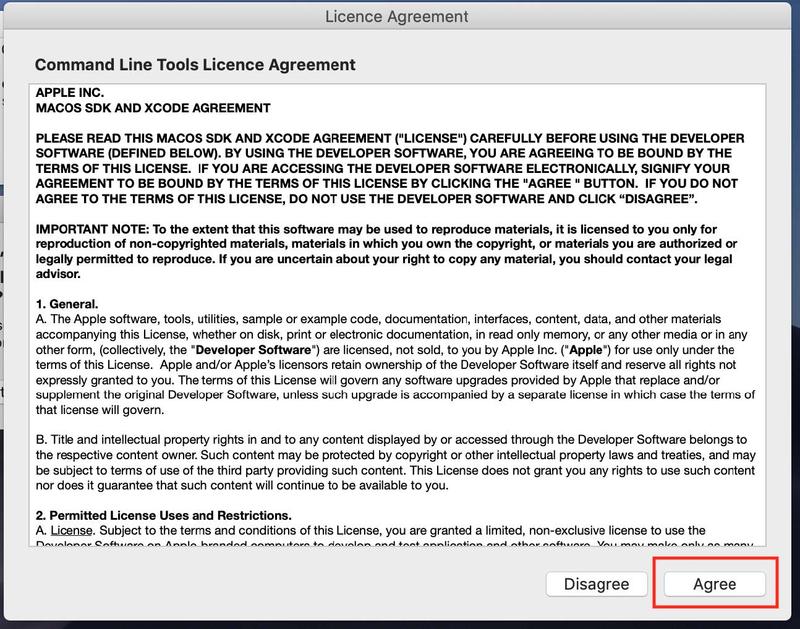
Read the Licence Agreement and click “Agree” to install.

Step 5
The Xcode will download and install, do not click stop.

Step 6
You will receive a confirmation message.

Step 7
You will now be able to compile programs, when you type “gcc” and press “return” in the Terminal window, your computer will look for input files to compile and you will receive an error message. You can clarify this by typing “gcc –version” to see the version of gcc you have installed.

Step 8
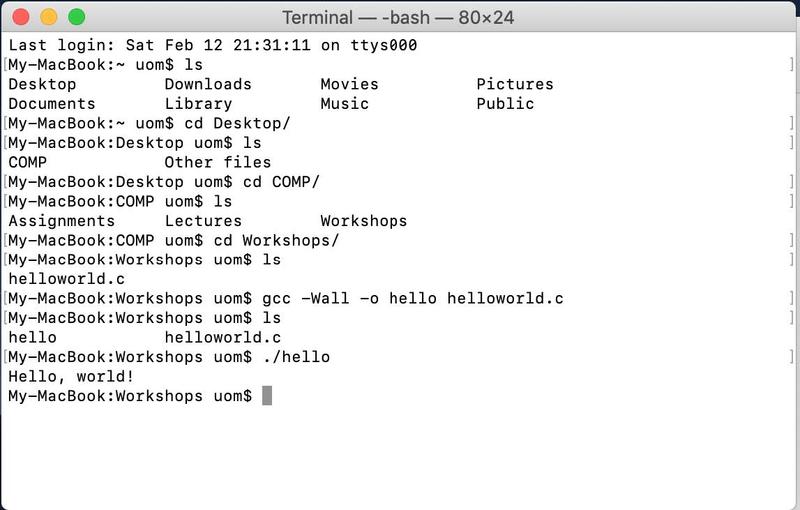
Proceed to the VSCode installation and setup. You will now be able to compile the code you write. Note, once you have written C code in VSCode, you can also open Terminal and navigate to its location, compiling and running in the Terminal window as below.

Follow the instructions on VSCode installation, setup and debugging to start coding.
Prepared by Thomas Minuzzo, February 2022