How to install WSL, Ubuntu, clang/gcc, and VSCode
This guide will walk you through the process of installing Windows Subsystem for Linux (WSL), Ubuntu, clang, gcc, and VSCode onto your Windows computer. This will allow you to write C programs and run them on your Windows computer. If you run into any issues, please contact the subject staff.
Step 1
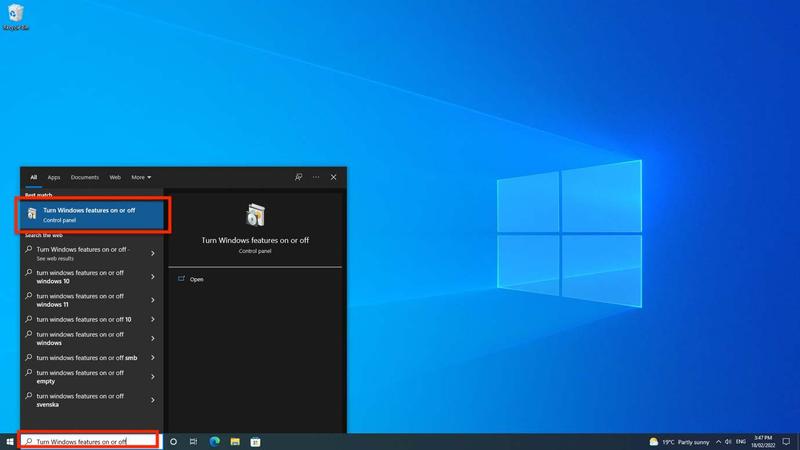
Search the start menu for “Turn Windows features on or off”
Step 2
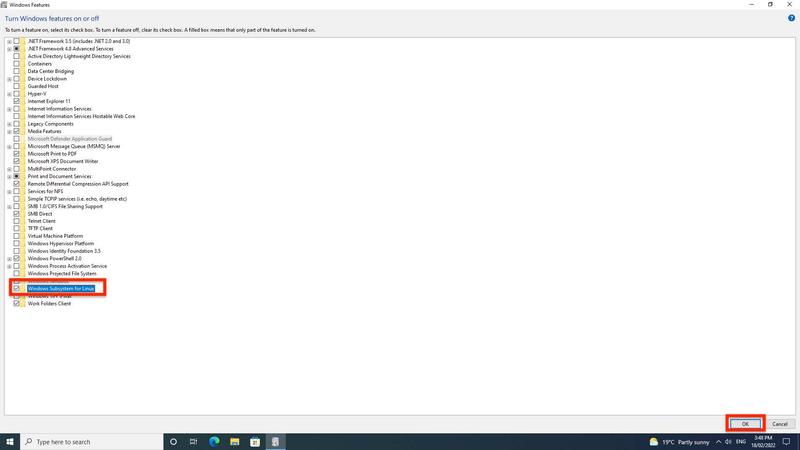
Select “Windows Subsystem for Linux” and click “OK”
Step 3
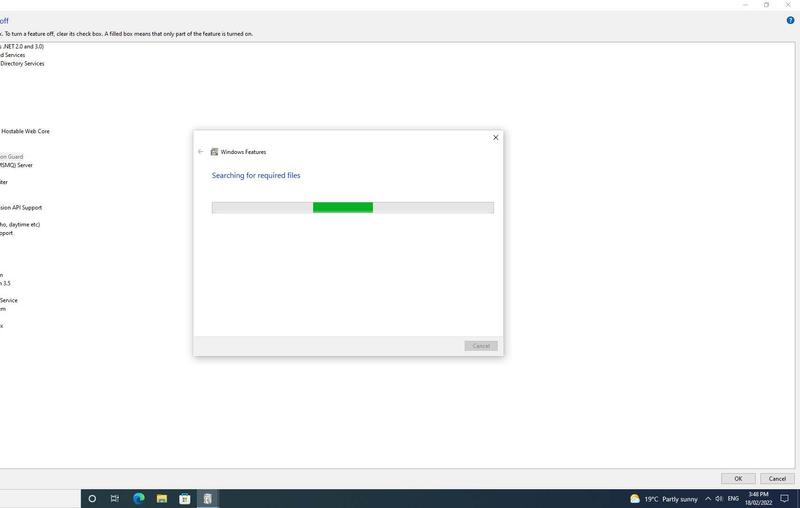
Wait for the changes to apply.
Step 4
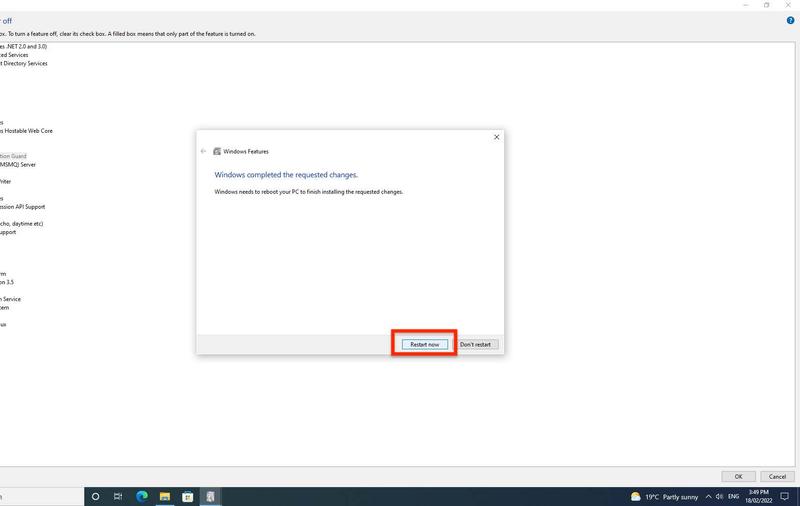
Restart.
Step 5
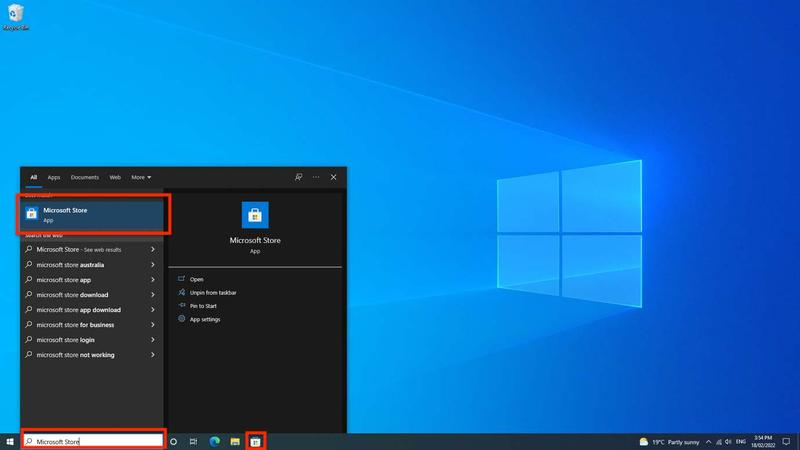
Open the Microsoft Store.
Step 6
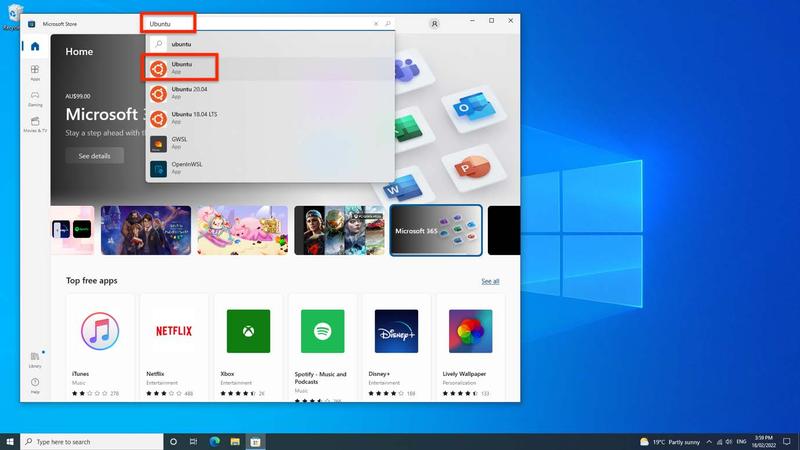
Search for “Ubuntu”
Step 7
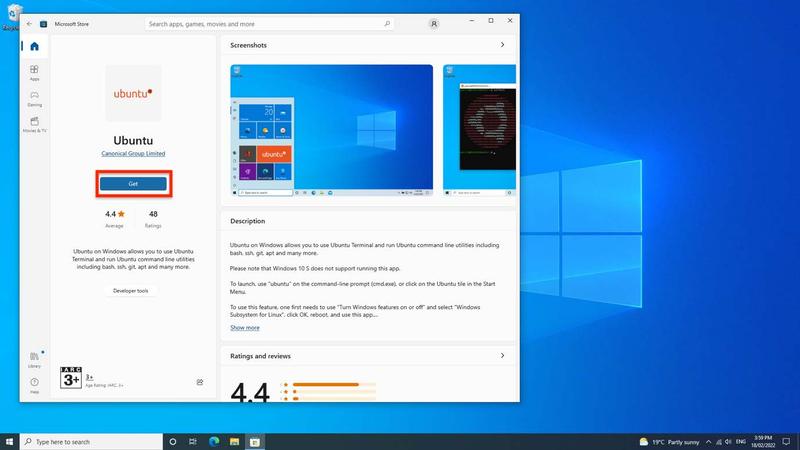
Click “Get”
Step 8
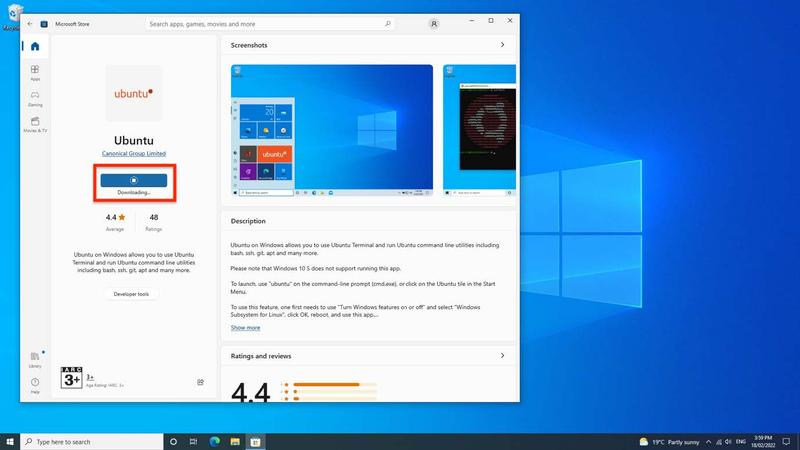
Wait for it to download
Step 9
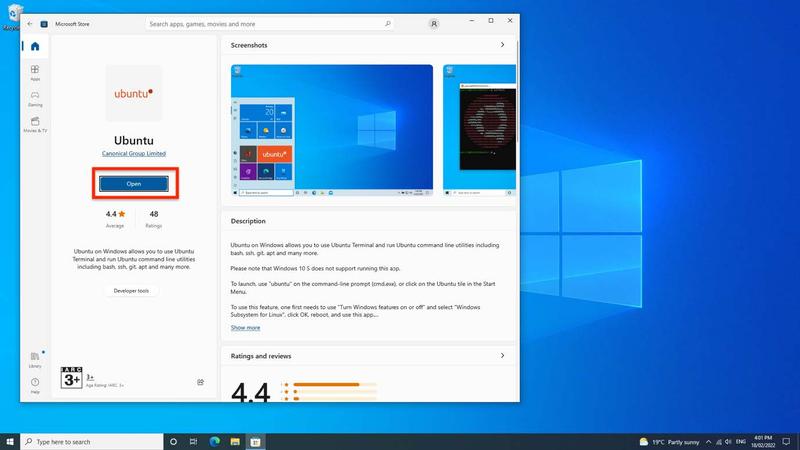
Click “Open” when it is finished. Note, you can now find Ubuntu by searching the Start menu or opening Powershell and typing “wsl” and pressing Enter.
Step 10
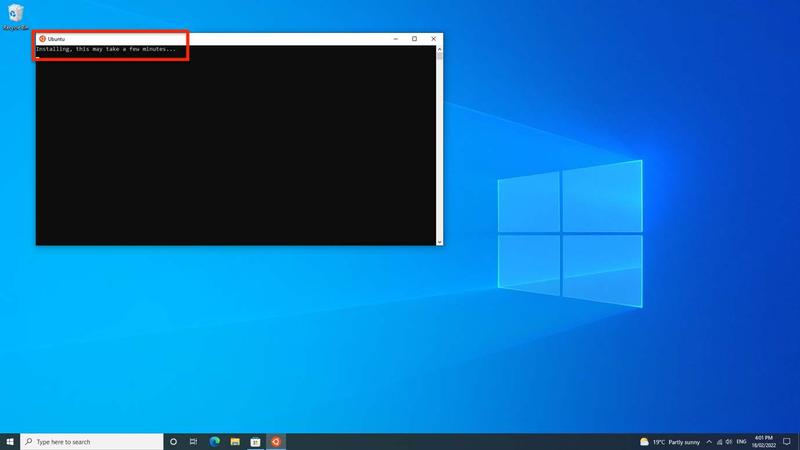
When Ubuntu is open, wait for the installation to complete.
Step 11
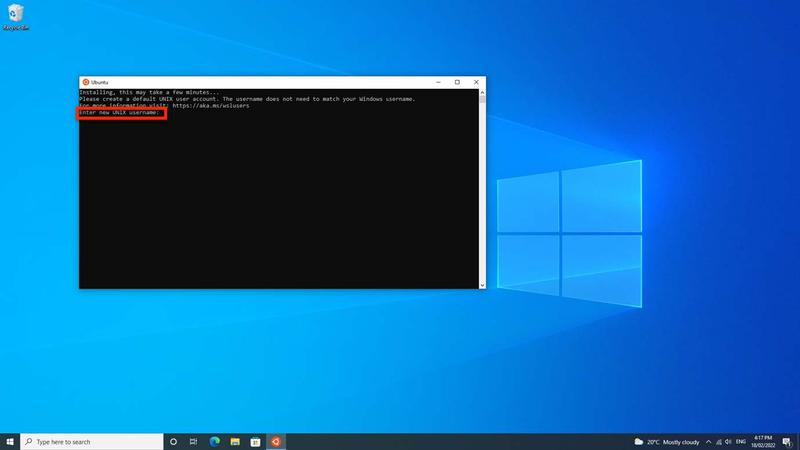
When the installation is complete, you will be prompted to create a new user account.
Step 12
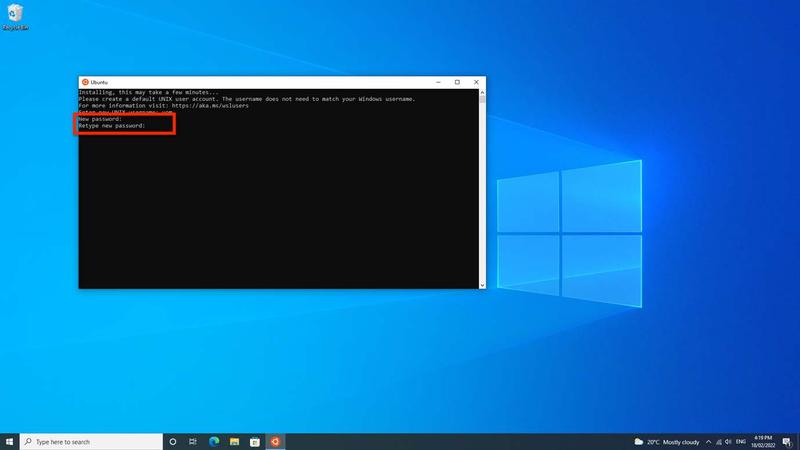
You will then be prompted to create a password by typing in a password and pressing enter (you will have to retype the same password twice). Note, the password will be hidden as you type. Use something easy to remember, e.g., your Unimelb username and password.
Step 13
You will now be inside of Ubuntu.
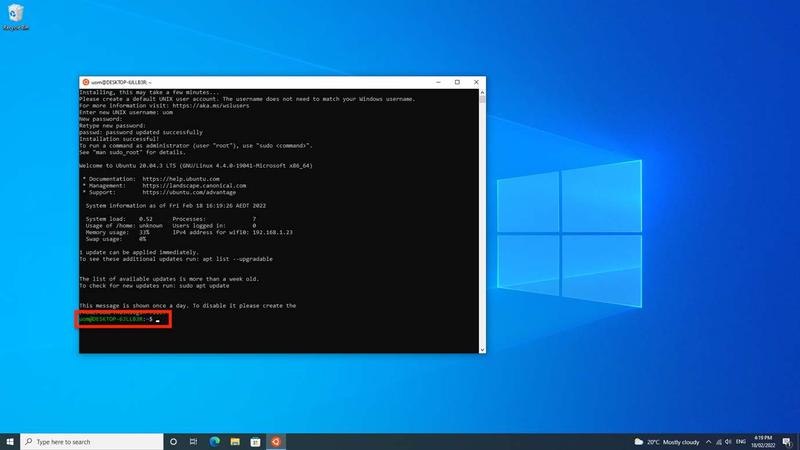
Step 14
Update everything inside Ubuntu by typing the command: sudo apt update && sudo apt upgrade
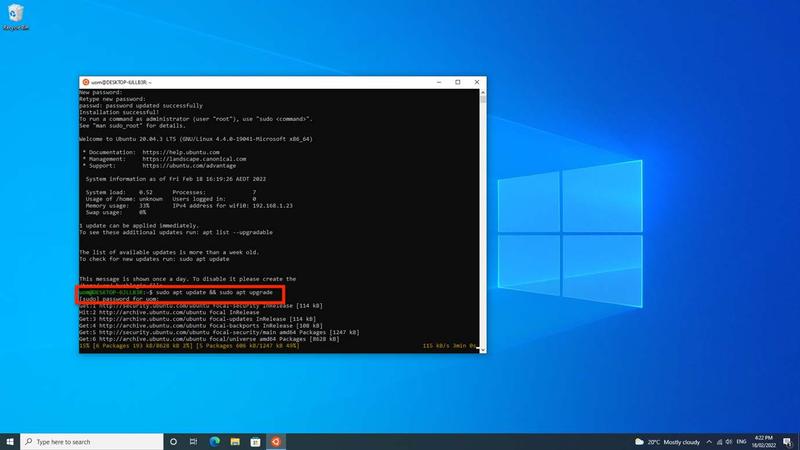
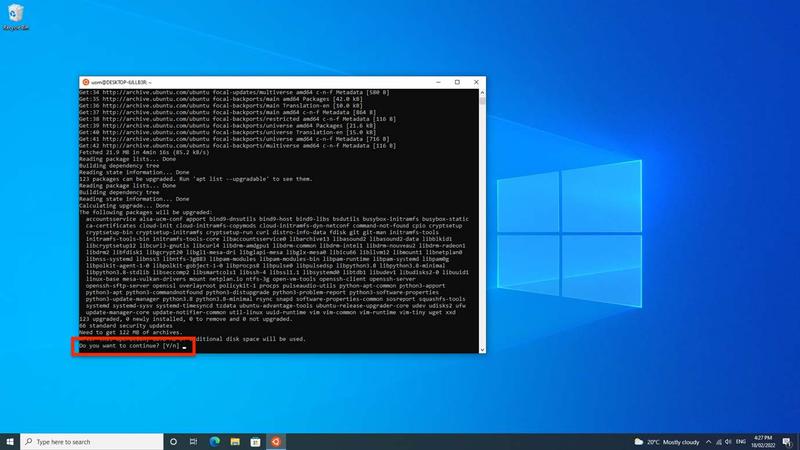
Note, you will need to type your password here. You will also be asked to confirm by typing “y” (You can add the command “-y” to the above command to automatically confirm).
Step 15
After everything is finished, you will also need to install build tools (gcc and clang), run the following two commands: sudo apt install build-essential bash -c “$(wget -O - https://apt.llvm.org/llvm.sh)”
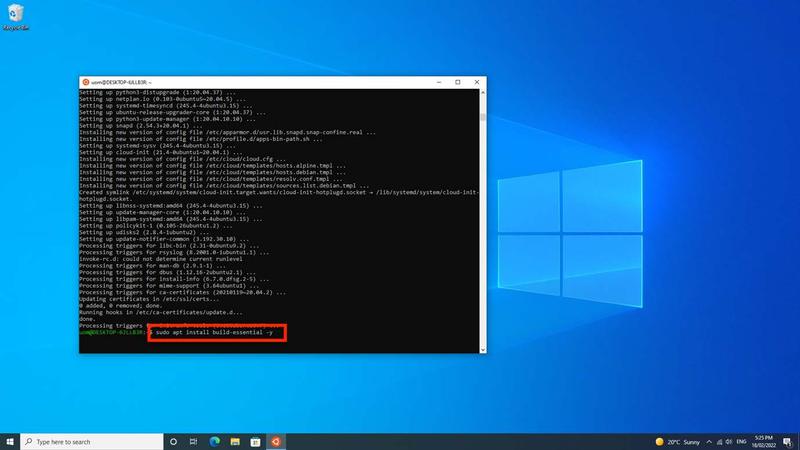
Note, if you do not add the “-y” you will be asked to confirm as above.
Step 16
Double check that gcc is correctly installed by typing the command: gcc –version Double check that clang is correctly installed by typing the command: clang –version
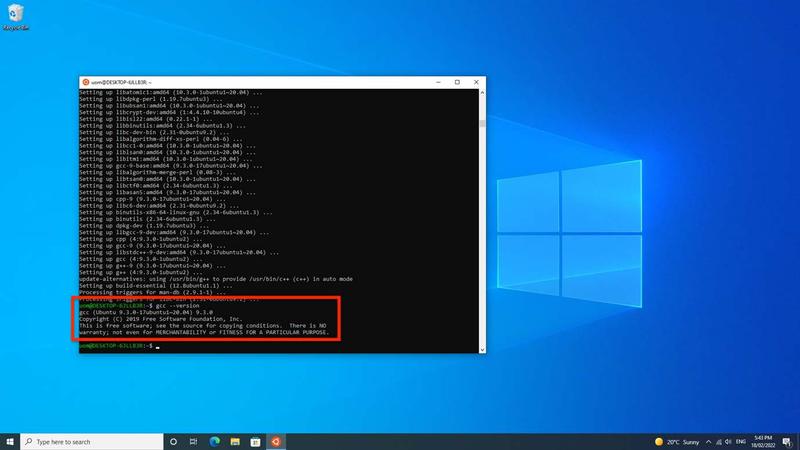
If you are shown the versions of gcc/clang and not an error, continue.
Step 17
You can navigate to your C drive my typing the command: cd /mnt/c
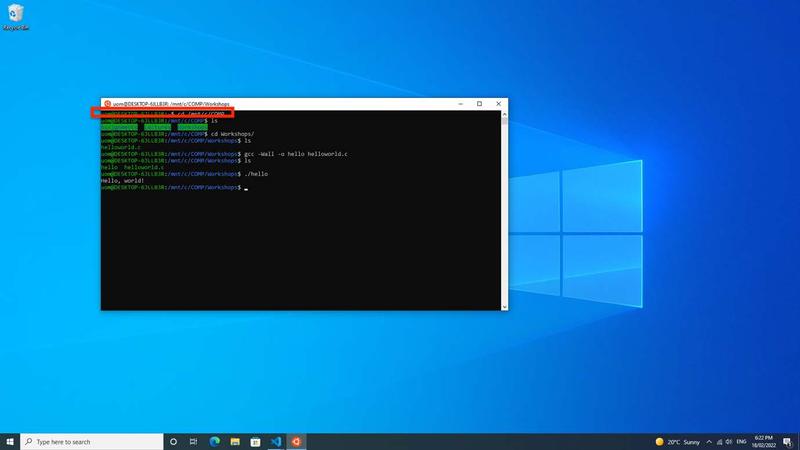
Note, in this example, we navigate to our COMP folder in the C drive. Next, we use the command “ls” to show what is in the current folder. Next, use the “cd” command again to navigate to the Workshops folder where we can see a Hello World C program prepared earlier. We compile this program with the “gcc” command into an executable called “hello”. We can then see it exists in the folder. We then run the program with “./hello” and the computer talks. Writing C programs can be done in VSCode as presented in the VSCode setup guide.
Step 18
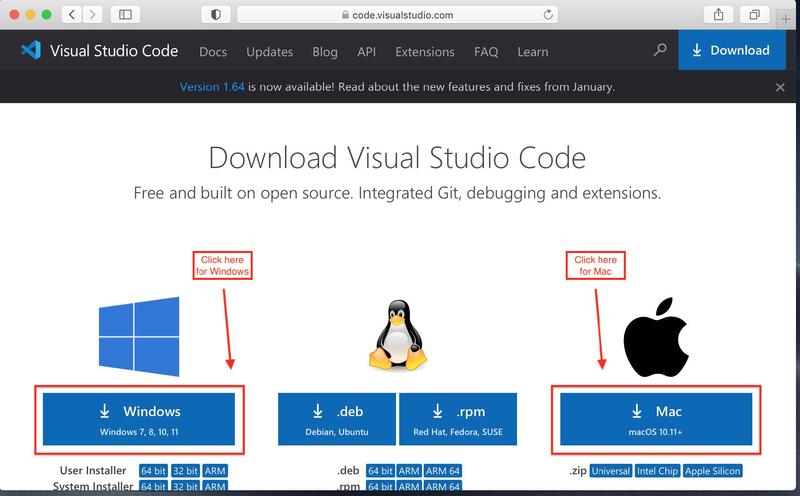
You will need to download VSCode and link it to WSL before continuing with the VSCode setup. Download VSCode from https://code.visualstudio.com/download and install.
Step 19
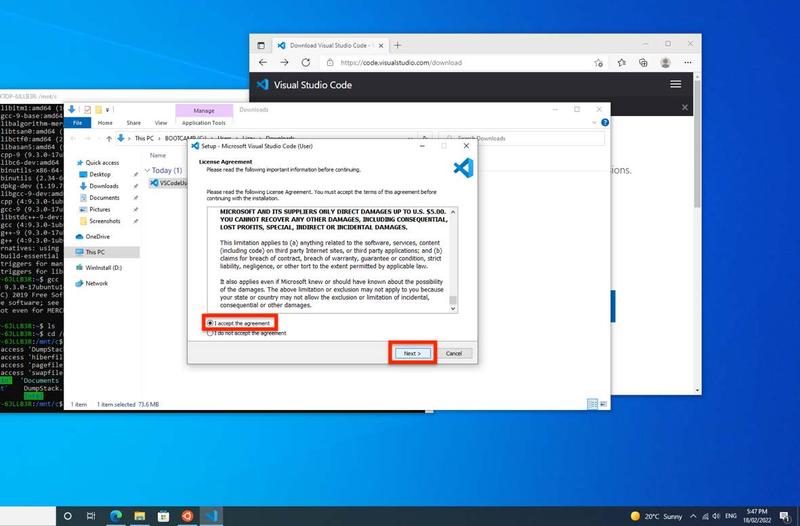
When you open the installer, you will be asked to read and accept a License Agreement.
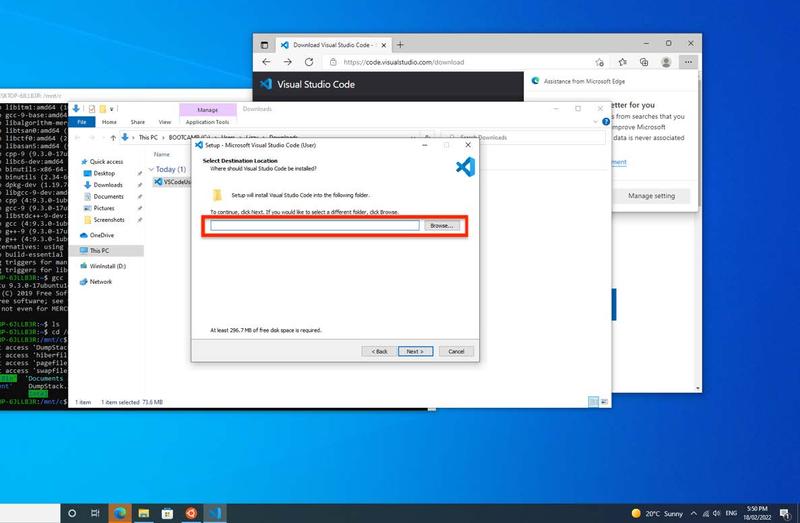
Step 20
Select where you would like to install VSCode
Step 21
Ensure you select “Add to PATH” this will allow you to type the command code .
when you are in Ubuntu to open VSCode inside the current folder. Then click “Next”
and “Install”
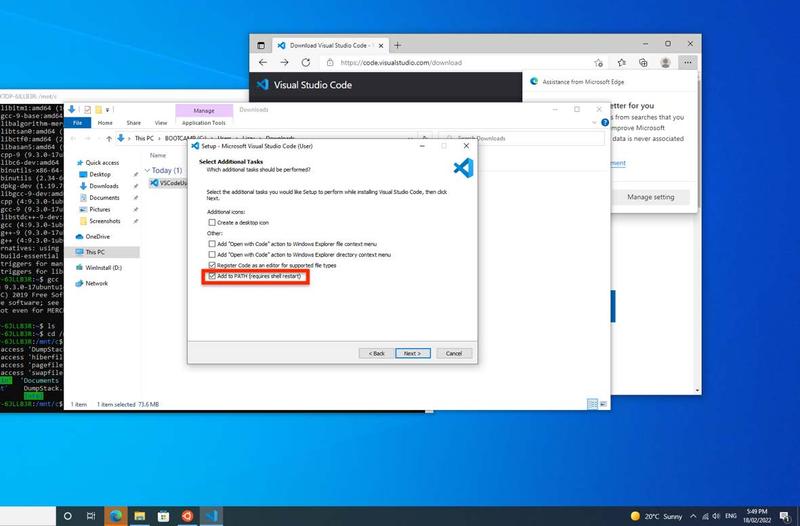
Note, if you installed VSCode without this option, you can open VSCode, open Command Palette (Ctrl+Shift+P) search and select “Add to PATH”
Step 22
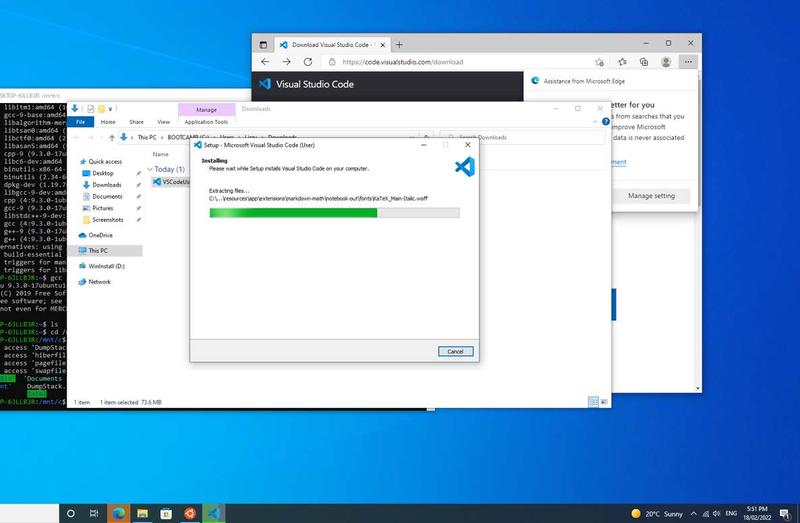
Wait for installation to complete.
Step 23
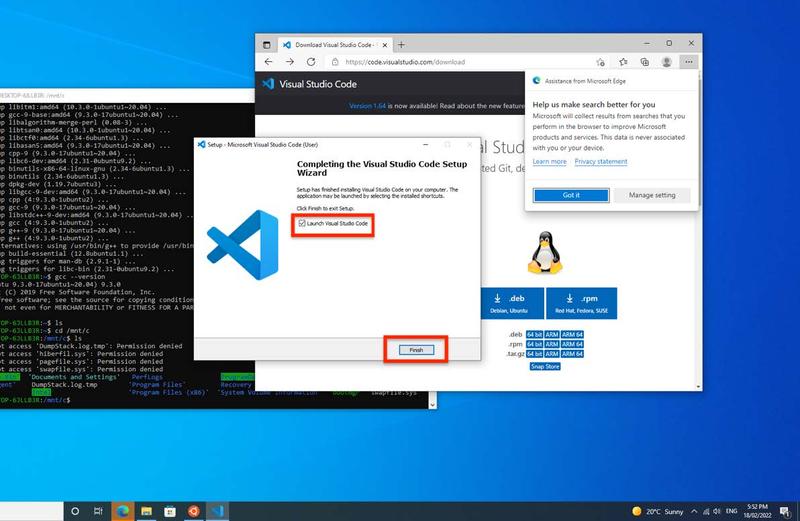
You can open VSCode when it is finished. Note, you may also open VSCode from the
Start Menu or from Ubuntu by typing the command code ..
This will require closing and reopening Ubuntu.
Step 24
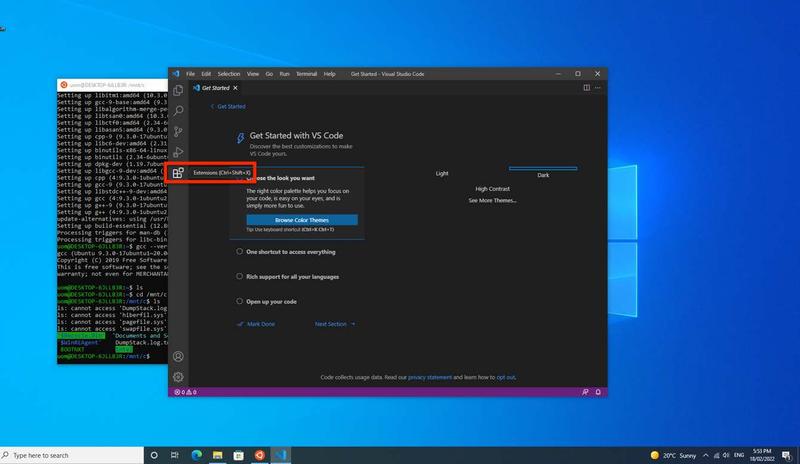
Go to “Extensions”
Step 25
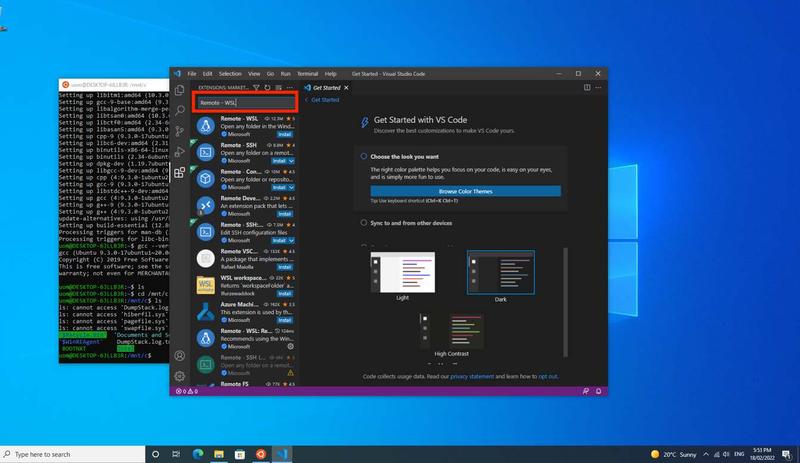
Search “Remote – WSL”
Step 26
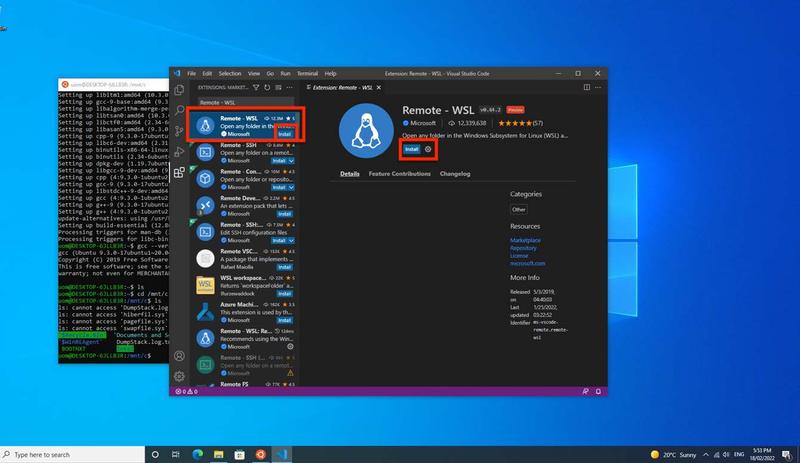
Click “Install”
Step 27
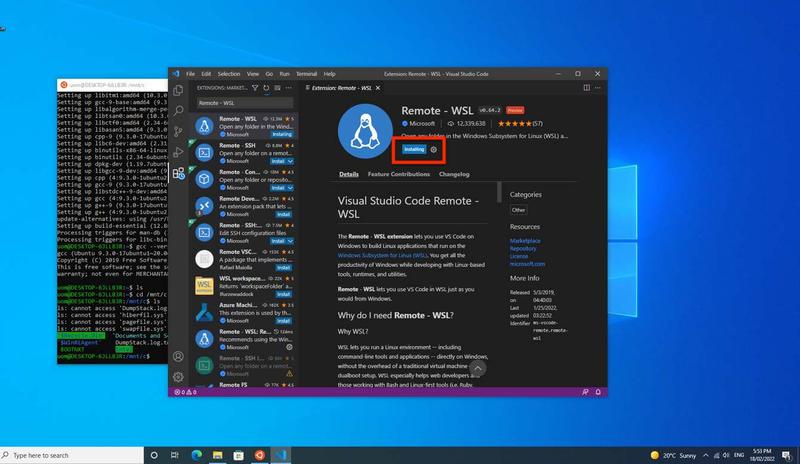
Wait for installation to complete.
Step 28
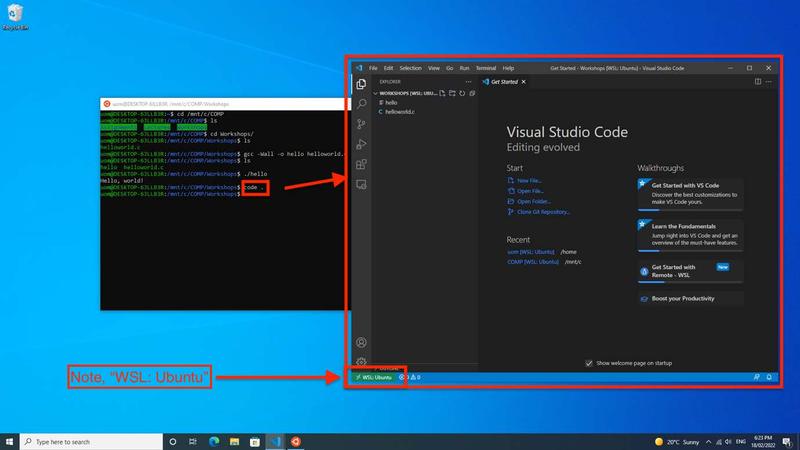
Now you can develop code within VSCode using the following methods.
Step 29
You can open VSCode within Ubuntu by opening Ubuntu and typing the command code
. note the indicator in the bottom left corner.
Step 30
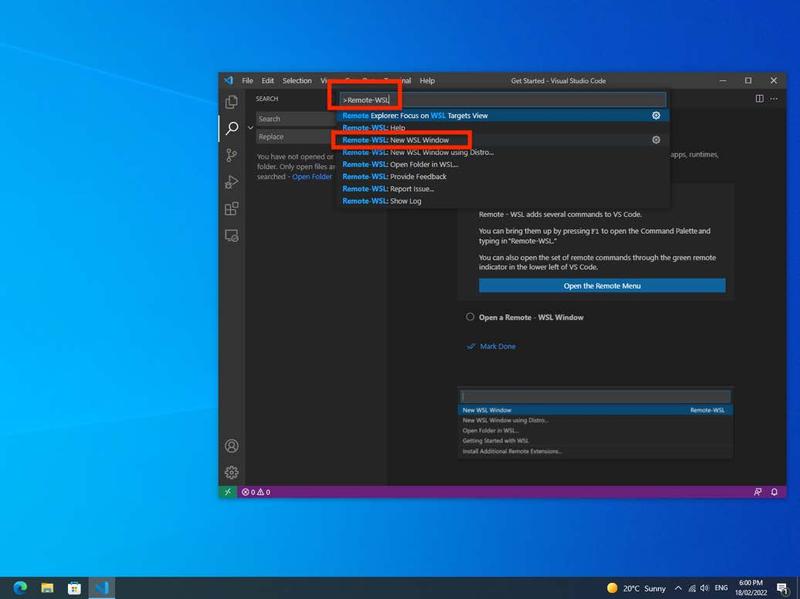
Alternatively, you can open from VSCode. Press F1 and select “Remote-WSL: New Window”
Step 31
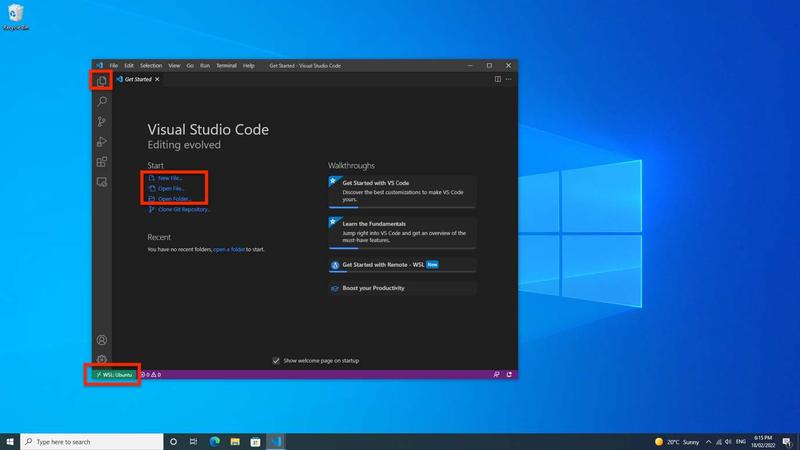
Note the indicator in the bottom left corner. You can use the Explorer tab or File menu in the top left to open folders graphically. The “Get Started” tab also offers further methods to open files and folders.
Step 32
Follow the instructions on VSCode installation, setup and debugging to start coding.
Prepared by Thomas Minuzzo, February 2022